Quickstart
Go from zero to a working MCP endpoint in 5 minutes.
Quickstart
This guide walks you through connecting a database, creating a tool, and exposing it to Claude — in under 5 minutes.
Prerequisites
- A Datatape account (sign up free)
- A database you want to query (PostgreSQL, MySQL, Snowflake, BigQuery, or Google Sheets)
- An AI client that supports MCP (Claude Desktop, Claude Code, Cursor, or ChatGPT)
Step 1: Create an organization
After signing in, you'll be prompted to create an organization. This is your workspace — all sources, tools, and team members live here.
Step 2: Connect a source
Go to Sources and click Add source.
- Choose your database type (e.g., PostgreSQL)
- Enter your connection details:
- Host, port, database name
- Username and password (read-only credentials recommended)
- Click Test connection to verify
- Click Save
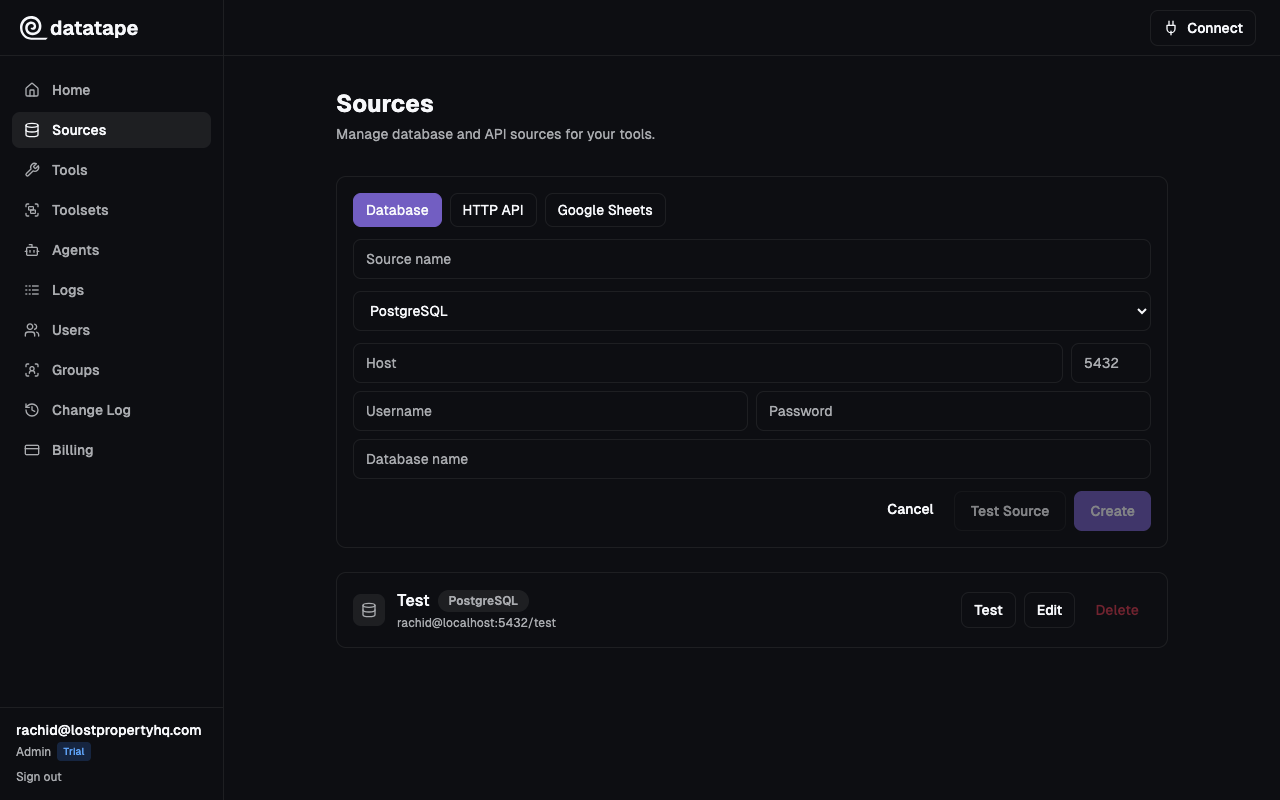
Your credentials are encrypted at rest with Fernet (AES-128-CBC + HMAC). They are never returned in API responses, never logged, and never accessible to AI agents.
Step 3: Create a tool
Go to Tools and click Create tool.
- Give it a name and description (AI agents use the description to decide when to call it)
- Select the source you just connected
- Write a SQL template:
SELECT customer_name, total_spent
FROM customers
WHERE region = {{ region }}
ORDER BY total_spent DESC
LIMIT {{ limit }}- Add parameters:
region— type:string, required:truelimit— type:number, required:false, default:10
- Click Test to run the query with sample values
- Click Save
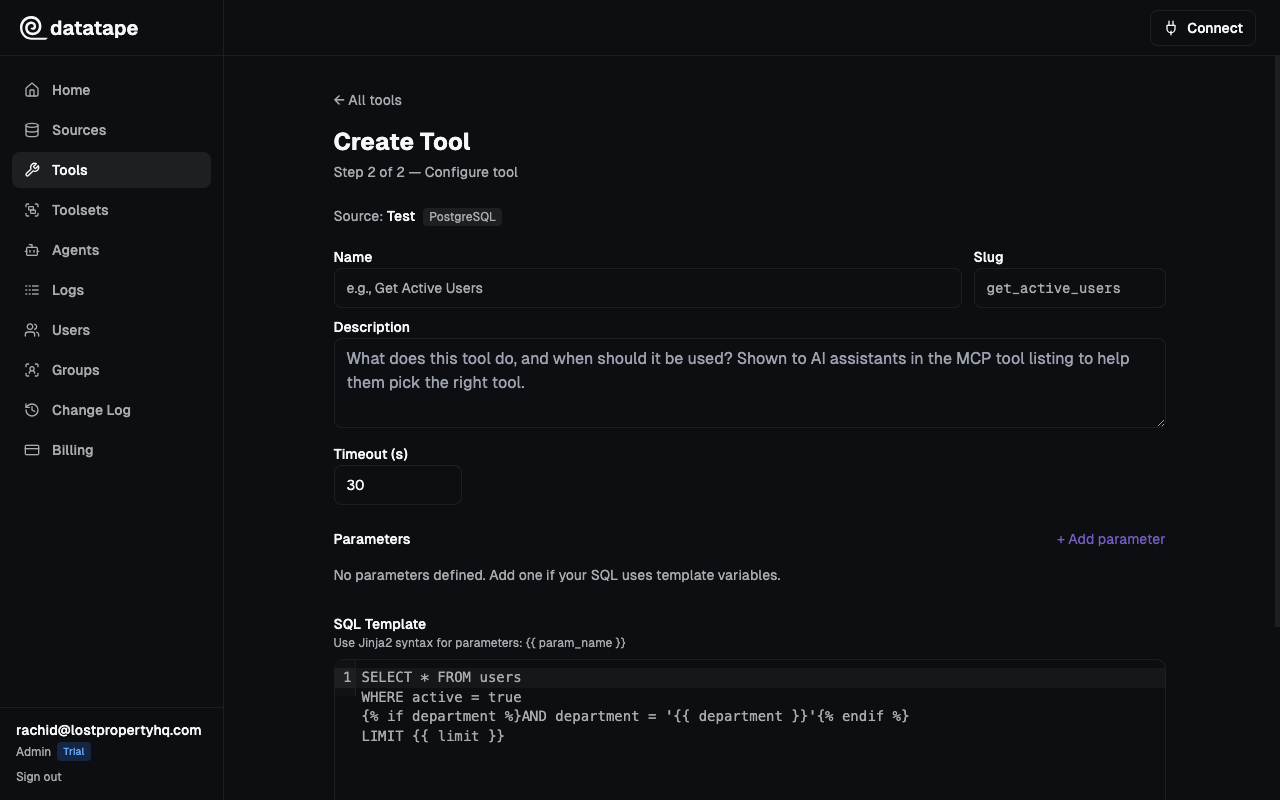
All SQL templates are validated as read-only by SQLGlot. INSERT, UPDATE, DELETE, and DROP statements are rejected at the platform level.
Step 4: Create an agent
Go to Agents and click Create agent.
- Give it a name and optional description (e.g., "Customer Data Bot")
- Assign tools directly or via a toolset
- Click Create
Your agent is created with an embedded API key. The full key is shown once — copy it and store it securely.
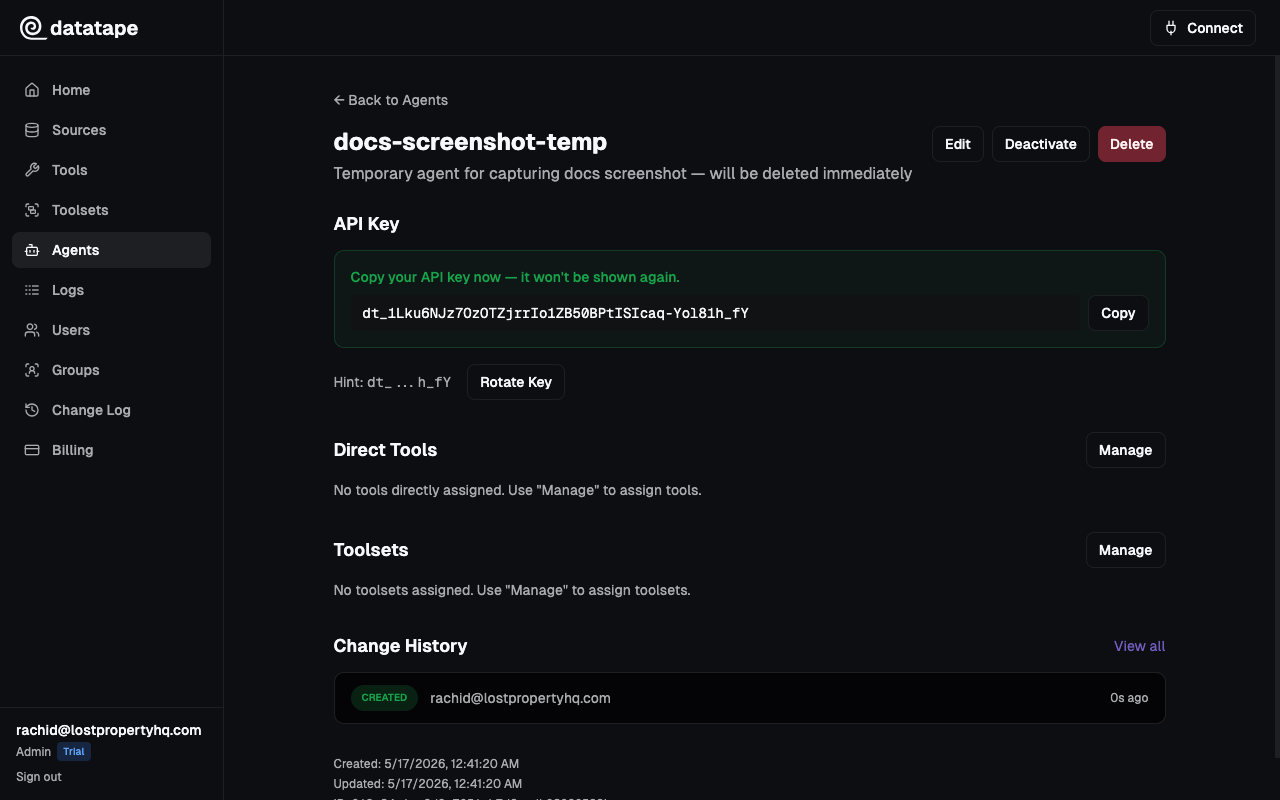
The API key is only displayed once at creation time. If you lose it, you can rotate the key from the agent detail page to generate a new one.
Step 5: Connect Claude
Your organization's MCP endpoint is:
https://your-org-id.mcp.datatape.ai/mcpClaude Desktop
Add this to your Claude Desktop config (~/Library/Application Support/Claude/claude_desktop_config.json):
{
  "mcpServers": {
    "datatape": {
      "url": "https://your-org-id.mcp.datatape.ai/mcp"
    }
  }
}
Claude Code
claude mcp add datatape https://your-org-id.mcp.datatape.ai/mcpCursor
Go to Settings > MCP Servers > Add Server and paste your endpoint URL.

Interactive clients like Claude Desktop use OAuth to authenticate — you'll sign in via your browser. For programmatic access, use an agent API key in the Authorization: Bearer dt_xxx header.
What's next?
- Connect more sources — PostgreSQL, Snowflake, BigQuery, and more
- Create advanced tools — Conditional clauses, Jinja2 templates
- Add team members — Invite your team and assign roles
- Create agents — Set up programmatic access with agent API keys